
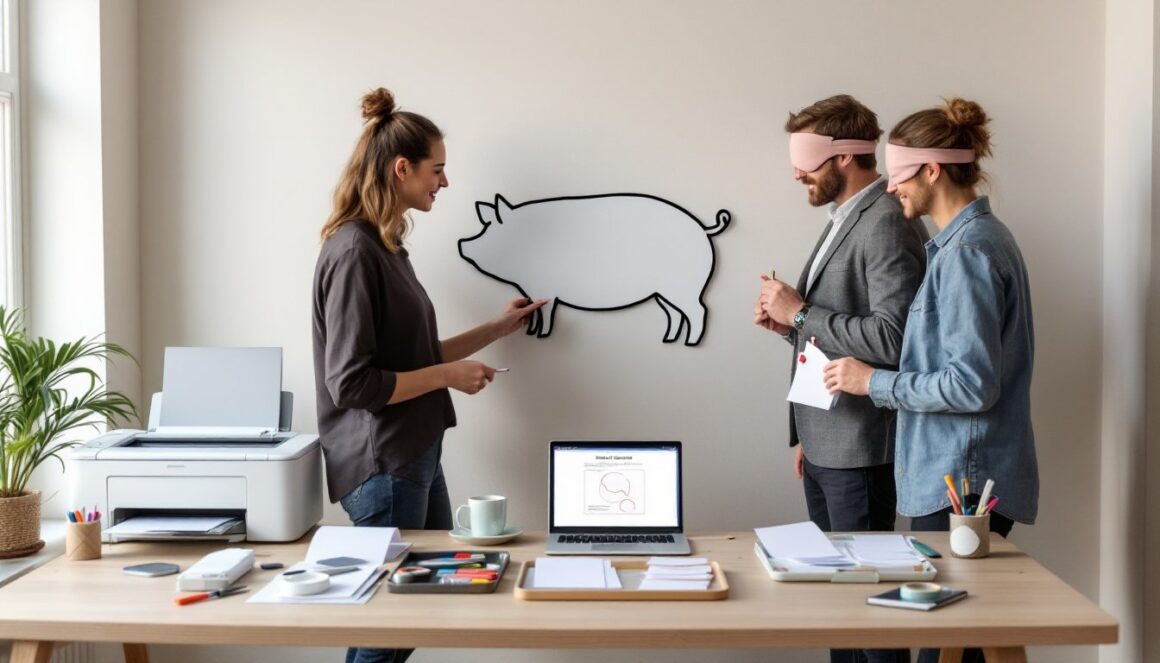
“Sätta knorren på grisen” is the classic Swedish version of “Pin the tail on the pig.” This guide gives a ready‑made mall (template) and clear, practical steps to copy, customize, and print a template for parties, preschool activities, or a quick holiday game. It’s written for homeowners, renters, and DIYers who want a no‑fuss setup using common office software and inexpensive materials. The instructions note safety and durability, blindfolds, tacky putty or tape, and paper weight, so the event runs smoothly and the game lasts through the party.
Key Takeaways
- The “sätta knorren på grisen” mall provides a simple, printable template to easily set up the classic Swedish party game “Pin the tail on the pig.”
- Using a ready-made mall saves time and ensures consistency for events like birthday parties, preschool activities, or holiday gatherings, especially when precise scaling and style are desired.
- Print the pig outline on durable 160–220 gsm cardstock in A4 or A3 sizes and prepare multiple tail pieces for smooth gameplay and quick rounds.
- Select safe materials like soft blindfolds and low-damage adhesives such as painter’s tape or adhesive putty to protect walls and keep the game area secure.
- Customize the mall with office software by adjusting size, orientation, and colors without needing special tools, making the mall accessible for all users.
- Always supervise blindfolded players and prepare a checklist to test print and verify materials, ensuring a fun and safe “sätta knorren på grisen” experience.
What “Sätta Knorren På Grisen” Means And When To Use A Mall
“Sätta knorren på grisen” literally means “put the pig’s curl (tail) on the pig.” It’s played like Pin the Tail on the Donkey: a pig outline without a tail is fastened to a wall, players are blindfolded, spun once or twice, then try to place a curly tail as close as possible to the correct spot. The winner is the one whose tail lands nearest the target, though the real fun is in the unpredictable placements.
When to use a mall (template):
- Quick, repeatable setup: A printable mall saves time for birthday parties, classroom activities, or holiday gatherings. It’s consistent and easy to reproduce for multiple events.
- If you prefer printing to freehand drawing: Not everyone can sketch a balanced pig: a mall gives a clear outline and proper scale.
- For themed events or crafts: Use a template when you want the pig in a particular style (cartoon, realistic, outline for coloring).
Practical notes and safety:
- Use a blindfold that’s soft and breathable: avoid tight knots around the head.
- Supervise young children and keep running or rough play away from the wall area to prevent falls.
- This project is strictly cosmetic, no building permits or structural work required. But, when mounting a large poster on drywall, avoid using heavy adhesives that could damage finishes: instead use painter’s tape or adhesive putty suitable for painted surfaces.
Materials and measurements to consider:
- Standard paper sizes: A4 (210 × 297 mm) or A3 (297 × 420 mm). An A3 pig fills more wall space: use A4 if printing at home without enlarging.
- Cardstock thickness: 160–220 gsm is a good balance for durability without hammering nails.
- Tail pieces: cut from 80–160 gsm cardstock or let players draw tails on small cards.
This section helps the reader decide if a mall fits their event and highlights simple safety and material choices to avoid last‑minute problems.
Step-By-Step Ready‑To‑Use Mall (Copy, Paste, And Print)
Follow these steps to create a basic, ready‑to‑use mall that anyone can copy, paste, and print.
Materials (simple list):
- Printer (inkjet or laser) with poster/tiles option for larger sizes.
- A4 or A3 paper: cardstock (160–220 gsm) for durability.
- Scissors, pencil, tape or adhesive putty, marker/crayons.
- Blindfold and a small ruler for marking the correct tail position.
Step‑by‑step instructions:
- Find or draw a pig outline without the tail. A simple line drawing or silhouette works best because it’s easy for kids to aim at. If drawing freehand, keep lines bold so they’re visible from a few feet away.
- Copy the image into a document editor (Microsoft Word, Google Docs, or LibreOffice). Use an image file (PNG, JPEG) or a vector for cleaner scaling.
- Resize the pig so it fills most of the chosen paper. For A4, aim for 180–250 mm wide: for A3, aim for 350–400 mm wide. Leave clear blank space where the tail should be, don’t place other features there.
- Add a light target marker (optional): place a small faint X where the correct tail spot will be. This helps judging later: erase or cover it if you want to keep the game purely guesswork.
- Print test on regular paper first to check scale and placement. If size is correct, print the final copy on cardstock. For very large pigs, use the printer’s “poster” or “tile” mode and assemble multiple sheets with tape on the back.
- Create tail pieces: draw or print multiple small curly tails (about 40–60 mm long) on another sheet. Cut them out and optionally attach a small bit of adhesive putty or double‑sided tape so they stick when pressed to the pig.
Practical tips:
- If several players will draw tails, include pre‑cut tails to speed rounds.
- For older kids or adults, use a marker to number each player’s tail on the back so results are fair and easy to score.
- Keep one measured tail as the “official” template to compare distances if needed.
This ready‑to‑use approach gets a complete mall together in 15–30 minutes with common household tools.
How To Customize, Format, And Print Your Mall Without Special Tools
Customization and formatting require only everyday office software and some sensible choices. Here’s how to make the mall match the party vibe and stay printable with consumer equipment.
Size and layout choices:
- Orientation: use landscape if the pig is wider than tall. Change page setup in Word or Google Docs.
- Scaling: set image size manually (for instance, width = 350 mm for A3 or 200 mm for A4). Lock aspect ratio to avoid distortion.
- Tiling: if the pig is bigger than your paper, use the printer’s poster mode or the “scale to fit paper” option and print across multiple pages. Trim white margins and tape sheets on the back so seams are less noticeable.
Color and style options:
- Black‑and‑white outline: good for pre‑school groups who want to color the pig.
- Full color: print on standard color settings: use heavier paper if markers or paints will be used later.
- Add text or decorations: include a title, game rules, or a score box at the bottom. Keep important artwork at least 10–15 mm away from the paper edge to avoid being cut off in printers with non‑printable margins.
Attachment methods that won’t damage walls:
- Adhesive putty: reusable, low‑damage, and holds cardstock well.
- Painter’s tape: clean removal on most painted surfaces. Avoid heavy duct tape on fresh paint.
- Magnets: if using a magnetic board or fridge.
Printing and durability tips:
- Paper weight: use 160–220 gsm cardstock for the pig and 120–160 gsm for the tails.
- Weatherproofing: for outdoor games, laminate individual tails or use clear packing tape on the pig to protect from wind and moisture.
- Colorfast ink: if using markers in the game, choose paper that won’t bleed. Test one tail first.
Accessibility and inclusions:
- Make a high‑contrast version for players with visual impairment (bold lines, dark tail pieces).
- For younger children or players who can’t be blindfolded, consider a sock over the eyes or use gentle sensory blockers: never tie anything tightly.
Tool alternatives:
- A circular saw and miter saw are unnecessary here, this is a paper craft. A craft knife and cutting mat, but, give neater tail edges than scissors.
- A basic printer suffices: a print shop can enlarge the mall to poster sizes if needed, but that adds cost.
These tips let the reader adapt the mall to their space, printer, and the age of players without specialized equipment.
Conclusion: Quick Checklist To Finish And Share Your Template
Use this short checklist before the party to ensure the mall is ready and the game runs smoothly:
- Pig outline without tail is centered and scaled correctly on the chosen paper size.
- Sufficient blank space left where the tail should be attached.
- Multiple tail pieces printed or prepared (about 6–12 tails for small groups).
- Materials: blindfold, tape/adhesive putty, scissors/craft knife, pens/crayons.
- File saved as a common format (PDF or DOCX) for easy sharing and reprinting.
- Test print checked for size, margins, and readability: poster tiles assembled if used.
Final safety reminder: always supervise blindfolded players and use soft, breathable blindfolds. With a simple mall and common materials, anyone can set up an authentic “sätta knorren på grisen” game quickly and share the PDF with friends or classroom colleagues. Have fun, and expect some wildly creative tail placements.