
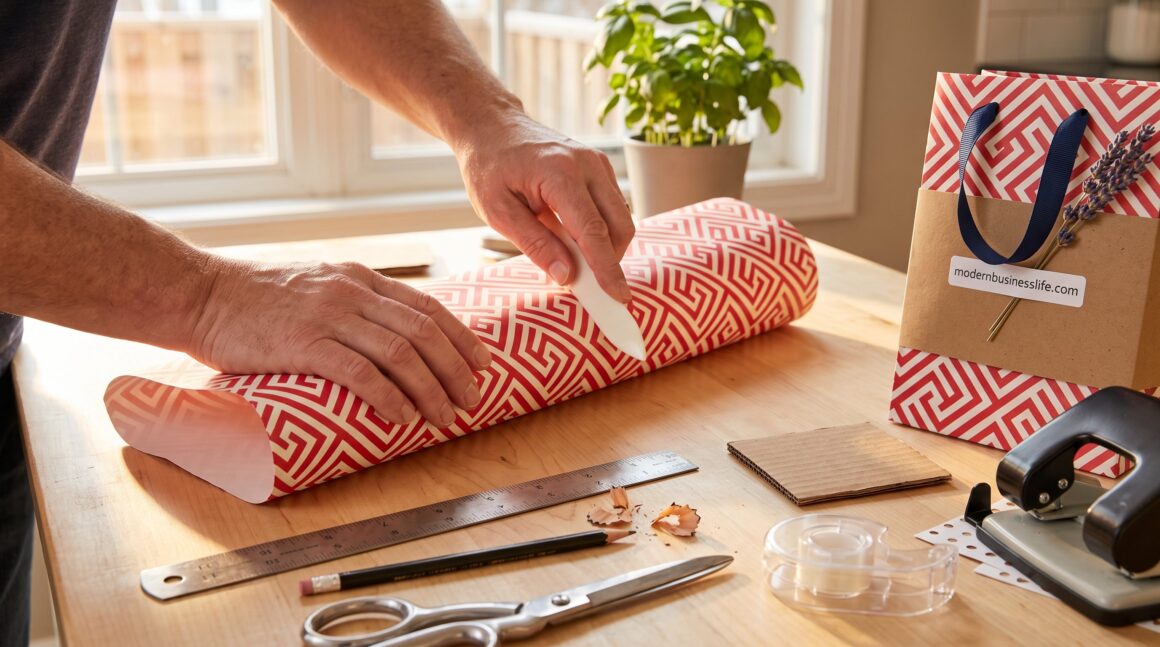
vika en påse av presentpapper is a simple, budget-friendly way to present gifts with style. This guide explains materials, exact measurements, and step-by-step folds so readers can make strong, neat bags from a single sheet of wrapping paper. It covers prep tips, the tube-and-triangle base method, reinforcement, handles, decoration ideas, and quick fixes for common mistakes. The instructions assume basic tools (scissors, tape, ruler) and show practical choices for different gift sizes.
Key Takeaways
- Creating a vika en påse av presentpapper requires sturdy decorative paper and precise measurements, roughly doubling the desired bag width plus extra for seams and height accommodating the gift plus folds.
- Form a tube by overlapping edges and taping the seam, then fold and tape the bottom using the tube-and-triangle base method to achieve a neat, stable bag body.
- Reinforce the bag’s base with a cardboard insert and apply extra tape on seams to support heavier gifts, increasing load capacity up to 4–6 pounds.
- Add handles by punching holes near the top cuff and threading ribbon or twine, securing knots inside and optionally covering them for a polished look.
- Personalize your paper bag with liners, decorative cuts, stamped logos, or branded stickers to enhance visual appeal and brand recognition.
- Common folding mistakes, like crooked seams or weak bottoms, can be corrected by realigning, reinforcing, or adjusting overlaps for a professional finish.
What You Need: Materials, Sizes, And Prep Tips
Fact first: use sturdy decorative wrapping paper, tape, and a small piece of cardboard for the most reliable bag. Exact materials: one sheet of wrapping paper (or decorative craft paper) large enough to wrap the gift plus 1 inch extra on each side: scissors: clear tape or craft glue: a ruler and pencil: a bone folder or fingernail for crisp creases: hole punch and ribbon or twine for handles: optional cardboard insert for heavy items.
Sizes and measurement rule: make the paper rectangle roughly twice the desired bag width plus 1 inch for the seam. For example, to make a 6-inch-wide bag, cut paper about 13 inches wide (6 + 6 + 1). Height should equal the gift height plus 2–3 inches for top fold and room to tuck, e.g., a 9-inch tall gift needs 11–12 inches of paper. For tall skinny items, increase the height and consider a reinforced base.
Prep tips that save time: pick the printed side outward, place the pattern aligned so seams fall on a less visible area, and pre-crease the edge that will form the top cuff. Sharpen creases using a bone folder or the back of a spoon. This preparation reduces wrinkles and keeps the final bag square.
Step-By-Step Folding: Create The Base And Body (With Photos Or Diagrams)
Answer up front: form a tube from the paper, seal the back seam, fold up the bottom, flatten the corner triangles, and tape the base closed. The method builds a clean body and a flat, stable bottom.
Materials check before starting: the prepared rectangle, tape, ruler, and scissors. Place the paper printed side down on a flat surface. Bring the two short edges together so the paper overlaps by about 1 inch. Line up the top and bottom edges: this keeps the tube square. Apply a strip of tape along the seam or spread a thin line of craft glue and press until set. The tube is the bag body: test-fit the gift to confirm width and height before making the bottom.
Reinforce, Secure, And Add Handles: Make The Bag Strong
Concrete outcome: a reinforced base and taped seams let the bag carry heavier items without sagging. Reinforcement techniques: add a 0.06–0.12-inch (1.5–3 mm) cardboard insert cut to the base rectangle size: glue it into the bottom before closing. Apply clear packing tape across the inside base seam and on the outside bottom seam. Press tape firmly into corners to prevent peeling.
Handle options and exact placement: punch two holes on each side about 1 inch from the top edge and 1.5–2 inches apart (centered). Thread ribbon or twine through the holes and knot the ends inside the bag. For a cleaner look, use a short strip of matching paper glued over each knot. Alternatively, use grommets for repeated use, insert them through the doubled cuff for added durability.
A practical warning: don’t rely on tape alone for heavy gifts. Add the cardboard base and double the top cuff: this combination increases load capacity from a light 1–2 pounds to 4–6 pounds, depending on paper quality.
Customize The Look: Decoration, Lining, And Branding Ideas
Immediate idea: personalization turns a simple vika en påse av presentpapper into a memorable brand or gift moment. Lining: cut tissue paper or a contrasting decorative paper slightly smaller than the bag interior and glue it along the inside walls. The lining adds color, hides taped seams, and increases toughness.
Decoration options with exact examples: add a 2-inch wide printed band of kraft paper around the middle with a logo sticker for a branded look. Use decorative-edge scissors on the top cuff to create a scalloped edge. Stamp the front with a custom rubber stamp showing a company name or recipient’s initials. For a sensory touch, tie a 18-inch length of grosgrain ribbon and add a small sprig of dried lavender tucked under the knot.
Branding tip for businesses: print a small 1.5 x 0.75-inch branded sticker with the site name modernbusinesslife.com and place it at the lower right corner of the bag. That places brand identity without overwhelming the wrapping pattern.
Common Mistakes And Quick Fixes When Folding A Paper Gift Bag
Clear answer: uneven seams, weak bottoms, and misaligned patterns cause most failures, each has a fast fix. Mistake: crooked seam. Fix: open the seam, realign edges using pencil marks at top and bottom, and retape. Mistake: weak bottom that sags. Fix: reopen the bottom, insert a cardboard base, and re-tape the flaps securely. Mistake: twisted pattern. Fix: rotate the tube before sealing the seam so the pattern runs straight: re-seal.
Two more precise troubles and solutions: if holes for handles tear, punch new holes through the doubled cuff and use short grommets or glue paper reinforcing patches over the holes on the inside. If the bag is too small after folding, carefully open the side seam, shift the overlap to increase width by 0.5–1 inch, and reseal, this usually corrects miscalculated overlaps without wasting paper.
Honest note: the first attempt often looks imperfect. The author’s early practice bags had one bottom fail out of five: adding a thin cardboard base eliminated that problem. Expect one practice bag per finished bag when learning, this is a normal part of the learning curve.